The bathroom environment can be wet, damp, or humid—sometimes, it’s all three at once. Bathrooms are constantly at risk of water damage, so you need to protect the space with multiple layers of waterproofing material. How to waterproof a bathroom is straightforward, so let’s discuss the process step by step.
How to Waterproof a Bathroom in 7 Steps
Waterproofing is crucial when building or remodeling a bathroom. It keeps the space watertight, keeping mold and decay off the underlying structure. Here are some foolproof steps to get that leak-proof finish with absolute confidence.
Step 1: Preparing the Subfloor
Start by cleaning and drying your subfloor. Use a vacuum cleaner to take out all loose dust and debris. After cleaning the area, dry the subfloor thoroughly. Any trace of moisture can keep the waterproofing membrane from fully adhering to the substrate.
Step 2: Priming
The subfloor primer seals pores and gaps in the subfloor and creates a surface that the membrane can adhere to. Using a paintbrush or a roller, apply the primer starting from the innermost corners. Work your way to the door, paying extra attention to the leak-prone wall-to-floor junctions. Allow it to dry for the time specified by the manufacturer.
Step 3: Sealing the Joints and Corners
Leaks often occur in the shower area corners and at joints where the floor meets the wall. Apply a bead of sanitary-grade silicone at these points, ensuring the seal is continuous with no gaps. Use a jointing tool or a similar implement to smooth the silicone, further tightening the seal and maximizing its flexibility.
Step 4: Applying Waterproofing Tape
While the silicone is still fresh, apply waterproofing tape over the corners and seals. This reinforces your seals, making sure that they remain intact even if cracks inevitably appear on the structure.
Step 5. Waterproofing
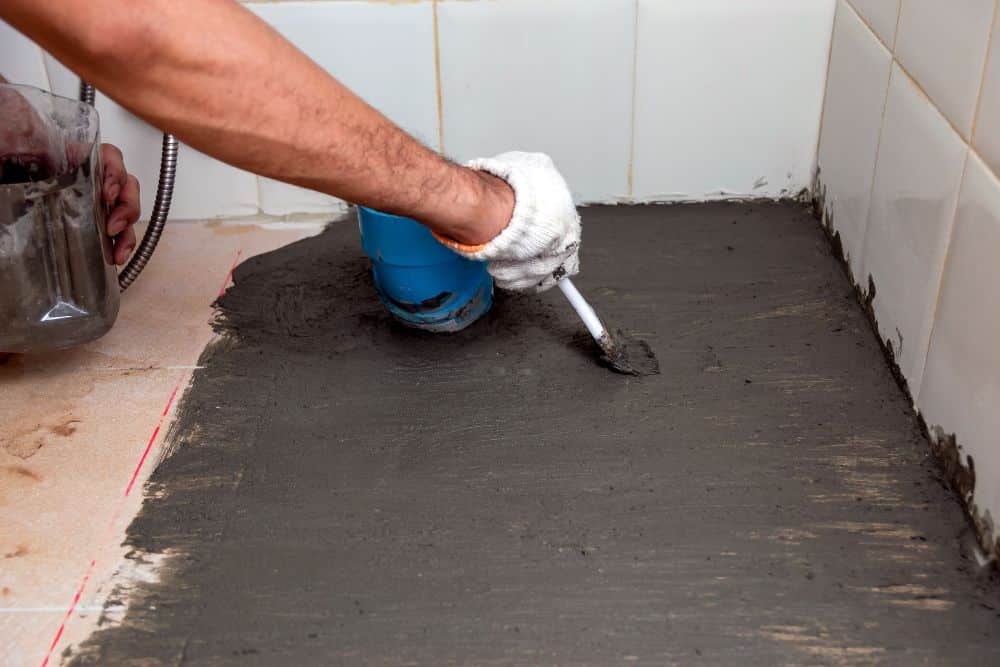
Once the primer has cured and the reinforced seals are in place, it’s time to apply the first coat of waterproofing membrane. This is the part where you’ll turn your bathroom into what’s essentially a watertight box. Do this in the following order:
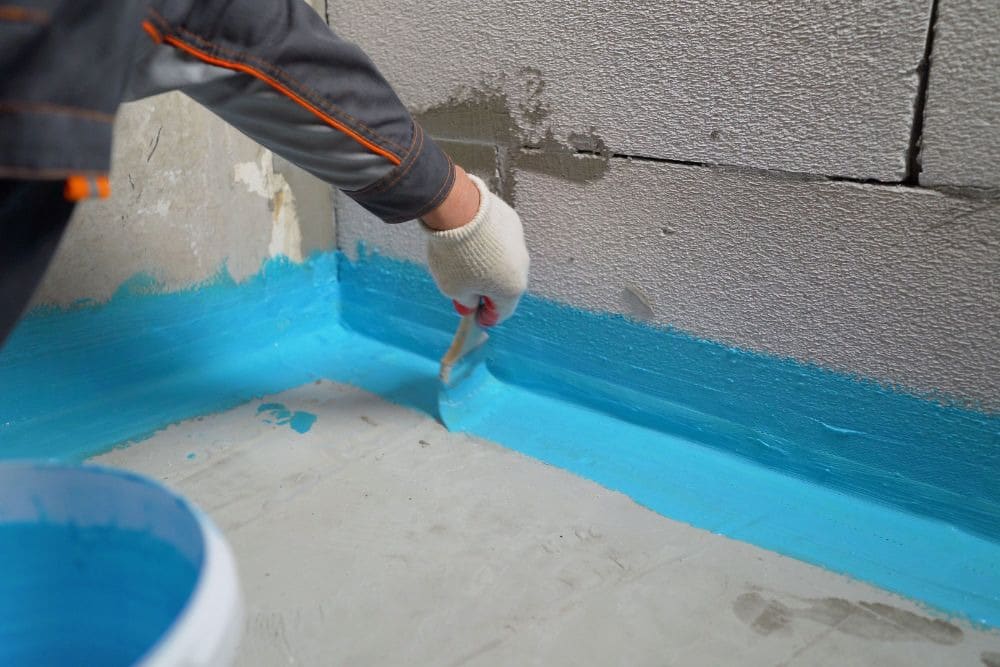
- Walls. Using a roller, start at the corners and work your way up. In the shower area, this should be at least 72 inches in height. For the rest of the bathroom a 6- to 12-inch high application should be enough to protect against spills and splashes.
- Floor. Starting at the farthest corner, apply a uniform, break-free layer of membrane in one direction. Work your way to the door to avoid stepping on your work.
- Corners and joints. Use a brush to coat the corners and joints with the waterproofing membrane. Make sure to completely cover the tape, ensuring it is fully embedded in the liquid.
- Penetrations. There should be gaps around the bases of the rough-ins. Apply the membrane around the bases of all the pipes. In the case of the drain, apply the waterproofing over the clamping ring or puddle flange. The resulting seal should direct moisture directly to the drain holes.
Leave the coat to dry for the time specified by the manufacturer. This usually takes 24 to 48 hours to fully cure.
Step 6: Adding a Second Coat
After the first layer has cured, you may now apply a second coat of waterproofing membrane. For broad surfaces, move the roller perpendicular to the direction of the first layer’s strokes. This creates a cross-hatching pattern that covers any gaps in the first layer. As with the first layer, leave the second one to dry and cure as per the manufacturer’s instructions.
Step 7: Testing
Perform a flood test to check for leaks in your waterproofing. In the shower area, plug the drain and fill the shower basin with water to at least an inch. Wait 24 hours and check for any reduction. After 24 hours, mark the current level. If the drop is negligible, that’s merely the effect of evaporation, and your waterproofing is good to go. However, a significant reduction signals a leak.
Step 8: Repairing Leaks
Begin by draining the shower base and thoroughly drying it with a vacuum, fans, and dehumidifiers. Look for a damp patch and remove that section. Clean and dry the area, then reapply the waterproofing in two successive coats. Let the patch cure, then repeat the flood test. Rinse and repeat if you discover any further leaks.
Can I Do My Own Bathroom Waterproofing?

You can waterproof your own bathroom, as long as the remodel or construction permits are already in effect. However, DIY projects are often prone to failure. As you have learned, any mistake or leak can delay completion by days.
Your best option is to hire a professional bathroom remodeling company. They bring years of experience and specialized equipment to the job, allowing them to complete the work seamlessly and on schedule. Plus, they carry a labor warranty that passes the cost of repairs to the contractor, saving you money in case of waterproofing failure.
Final Thoughts
Understanding how to waterproof a bathroom is knowing that it’s more than just adding a few layers of coating. It’s all about ensuring your space is watertight, allowing drainage to work as intended, and protecting your home’s structure. It is an investment in time and resources that rewards you with a bathroom that endures the test of time.
FAQs
What can I use to waterproof my bathroom?
To waterproof your bathroom, you will need the following:
- Primer. The primer covers the holes and seams on your subfloor. It also provides a surface for the waterproofing membrane to latch onto.
- Silicone. This is used to seal the seams between the walls and the floor and the corner joints.
- Waterproofing tape. This is applied over the silicone to reinforce and add further flexibility to the seals.
- Waterproofing membrane. Usually made of a water-resistant substance, it is used to create a watertight seal over your bathroom’s critical surfaces.
What happens if you don’t waterproof the bathroom?
Without waterproofing, water can seep through cracks and seams between your tiles. The water could infiltrate your bathroom’s underlying wooden structure, encouraging mold growth and rot that compromise its structural integrity.
What part of a bathroom needs waterproofing?
The bathroom floor and the walls adjacent to the shower area should be waterproofed, as they can get constantly wet. For wet baths, all bathroom surfaces should be waterproofed.
How long does waterproofing last in a bathroom?
Given high-quality materials and proper application, bathroom waterproofing can last until you need to replace the tile. This translates to a period between 15 and 20 years.
What are the signs that indicate a need for bathroom waterproofing?
Problems can arise in imperfect waterproofing applications. You will need to redo your waterproofing if you discover any sign of rot and mold growth, including:
- Recurring mold growth in grout.
- Damp, musty smells.
- Swelling, discoloration, or peeling of paint on the surface.
- Shifty, hollow tiles.
- Cracked or missing grout.