
Remodeling the floor can greatly enhance the beauty of a bathroom. Most bathroom floor renovation projects only require a change in the tiles, but it’s not as simple as it sounds. That said, let’s go over the basics of how to remodel a bathroom floor, including what you need, the proper steps, and how much it will cost you.
What You Need For the Bathroom Floor Remodel
Before we start looking into each step of bathroom floor remodeling, let us first take a look at what you’ll need for the project. For the materials, you will need the following:
- Tiles. The tiles comprise the surface layer—the component most prone to use and abuse. As such, it is important to choose the right material for your tilework. Popular options include ceramic, porcelain, and natural stone.
- Tile adhesive. This special compound bonds tiles to the surface. It is mainly made of cement mixed with additives that improve its strength and bonding properties, among others.
- Flooring underlayment. The underlayment is a material installed above the bathroom subfloor and underneath your tiles. It is generally required for bathroom floors as it adds a protective layer against moisture, preventing unnecessary water damage.
- Tile grout. Grout is the concrete-like material used to fill the spaces between your tiles. It provides the necessary sealing that protects your tiles from damage caused by moisture, bacteria, and dirt.
You’ll also need the following tools:
- Level. A spirit level, in particular, will help you check for unevenness and imperfections in the floor and the tilework.
- Trowels. You’ll need a notched trowel and a regular trowel to apply the tile adhesive and grout, respectively.
- Tile cutting tools. A manual tile cutter is handy for cutting irregularly sized tiles. For rounded or curved cuts, you will need a diamond blade wet saw or angle grinder.
- Cleaning tools. Have a vacuum cleaner ready to get rid of dust and unwanted debris. You also need sponges to clean the residue from the grout application.
- Rubber mallet. You can use this tool to gently tap uneven tiles. Alternatively, you may just use your hand to fix slight errors.
Now that you’ve sorted everything out, it’s time to plan out your bathroom floor remodel project.
What is the correct order to remodel a bathroom floor?
Assuming that you have an upgrade plan on hand, it should be easy to understand how to remodel a bathroom floor. The process is straightforward, and you only need to follow these steps:
1. Take out the fixtures
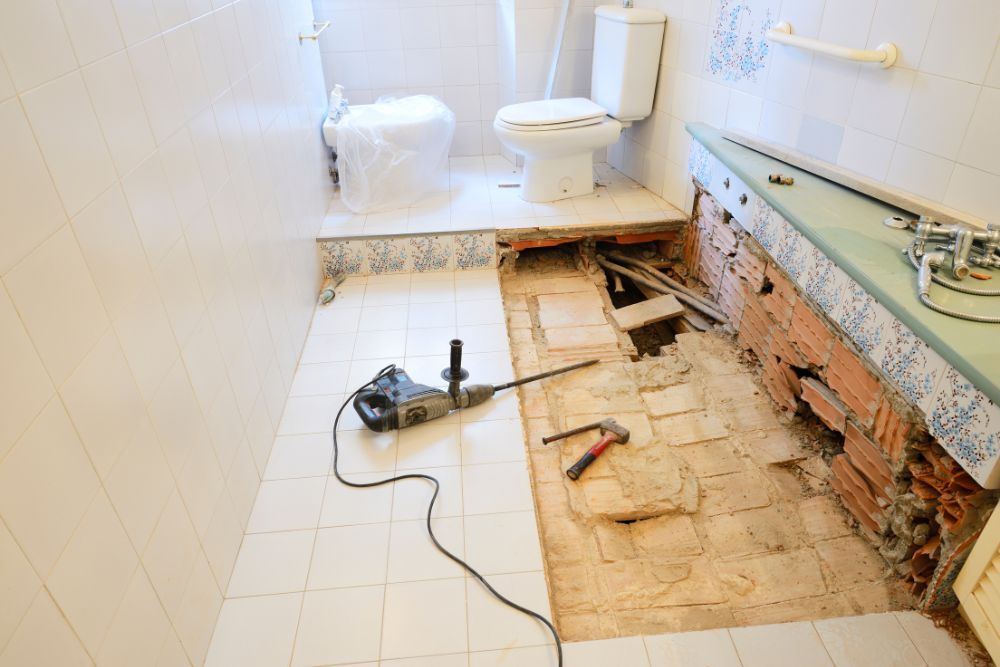
The first step is to clear your bathroom. You will have to remove your bathtub and disassemble the vanity. The same goes for everything else that sits on the tiles.
However, you will have to leave the toilet in place. Removing it takes a lot of work and means cutting and replacing the plumbing. Plus, you will need to cut the tiles and underlayment around the toilet anyway, so moving it is completely unnecessary.
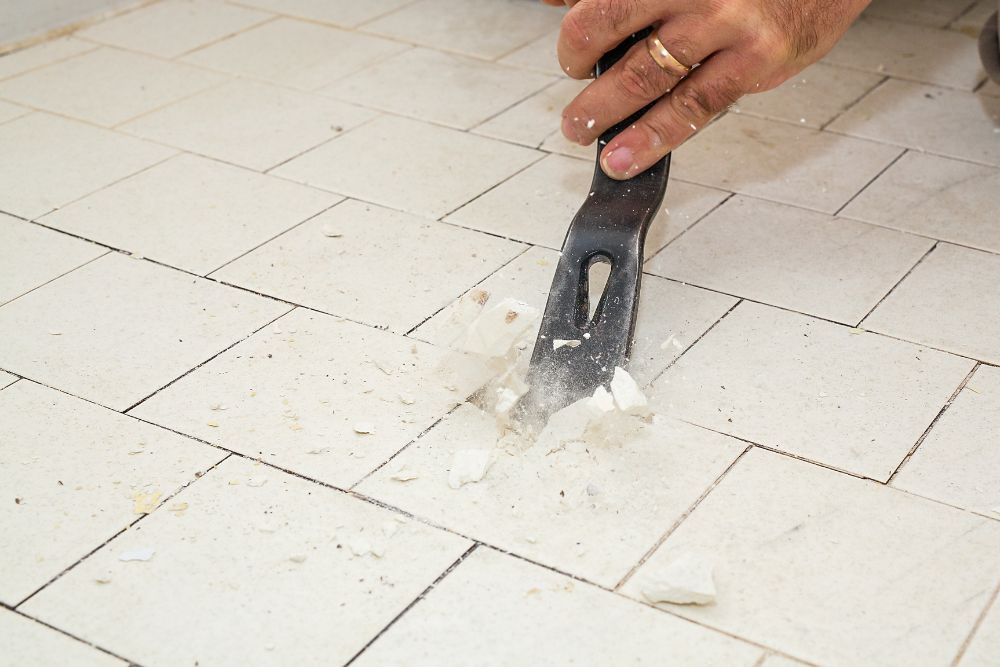
2. Remove the tiles
You will have to take out the old tiles to make room for the new tilework. Start by breaking the tiles up with a hammer or a power tool with a similar effect. Be careful with clearing up the rubble, as broken tiles can have sharp points and edges, and the demolition can leave heaps of fine dust. Once everything is out of the way, use tools like grinders to strip the subfloor of everything else that covers it.
3. Level the subfloor
With the subfloor largely exposed, it’s time to level the floor. Use a level and a ruler to look for unevenness on the surface. Once the problems are identified, sand down high spots and fill low spots with concrete. For imperfections covering a wide area, you may have to use self-leveling compound.
4. Install the underlayment.
Once the floor has been leveled to near-perfection, the next step is to install the underlayment. The previous steps would have left some debris and dust, so first make sure that the subfloor is clean and dry.
Next, check the instructions to see if the underlayment requires an adhesive. If it does, prepare and apply the adhesive according to the manufacturer’s instructions.
Lay down the underlayment with the vapor barrier facing up. Install each piece closely together, then secure the seams with a durable tape. The tape adds a protective layer that keeps moisture out of the gaps.
5. Install the tiles.
To install the tiles, you will first need to prepare the tile adhesive according to the manufacturer’s instructions. Use a notched trowel to apply the adhesive to the surface. Ensure that the notches follow the same direction to maximize tile adhesion. For large tiles, you may also need to apply a layer of adhesive to the back of each tile.
Lightly press the tile into the adhesive to fix it in place. Arrange the tiles closely together, but not tightly packed. Leave a gap of 1/16 and 1/8 inch between the tiles to allow for space for expansion—tiles can increase in size with high temperatures.
You will have to cut tiles in tight spaces, such as corners and the area around the toilet. You can use a manual tile cutter for straight cuts and a diamond-edged grinder for curves and rounded edges.
With all the tiles set, use a level to check the tiles for evenness and alignment. You can use a rubber mallet to lightly tap an errant tile back in place. Once everything’s in order, allow the adhesive to set in 24 to 48 hours.
6. Apply the grout.
With the tiles in place, you can now apply the grout. Start by mixing the grout according to the manufacturer’s instructions. Use a simple trowel to apply the grout between the gaps. Be sure to push grout as deep as possible into the joints.
Remove any excess grout using a rough sponge or a similar cleaning tool. Check for spots you may have missed, and apply grout accordingly. Once everything looks good, use a moist, not wet, sponge to clean the tiles of any persistent excess grout.
Use your index finger to push a dry sponge along the grouted lines to smooth and even the surface. Let it sit for an hour, then use a microfibre towel to remove the residue. With your tilework cleaned up, wait for the grout to dry as indicated by the manufacturer.
How Much Does It Cost to Redo the Floor In a Small Bathroom?
A bathroom floor remodel usually costs $12.50 per square foot. T0he final price depends on the labor and materials used. Remodeling the floors of small bathrooms—between 15 and 36 square feet in area—can cost you between $90 and $216 at the cheapest. More expensive rework will set you back by $154 to $396.
Summing Up
Remodeling a bathroom floor is not a complicated task, although there are certain considerations involved. Most homeowners can manage the work, and it only takes an understanding of the materials, tools, and processes involved.
Going DIY with your bathroom floor remodel offers plenty of opportunities for personalization and savings. However, this remains a task best done by professionals. BB-Builders Pro can upgrade your bathroom floor without risking the integrity of the underlying structure. Call us today and get a quote.


